I'm going to change the title headline to include the new update dates now so people can see when I've updated this step by step post without scrolling down looking for new images.
I've wanted to do this horse ever since I saw this picture. So I've finally decided to do him. I only have the one side but I can freestyle the other side.
This is gonna be fun.
This is what I'm going by.
And here are the progress pictures. What I'm gonna do is just keep editing this post to add the newer images to it instead of starting new posts for the continuation of the model. It's looking rough at first but I'm doing so many layers it'll finally take shape some where along the way.
Until I get to that point it'll just look a bit rough.
Here are some new images for today Sunday, March 29, 2015. There are so many layers to this guy's coat it's not even funny! But I'm sinking the pattern deep into the coat. I don't know what you'd classifiy this Appy as. I know he's a blanket Appaloosa. But I think maybe he's a varnish blanket appy. A Bay Varnish Blanket Appaloosa is what we're going for I think.
Here are some more images. Sorry the camera went fuzzy on the last one even though I sharpened the image some it didn't help. I think I was a little out of focus plus I didn't use the flash for that one I think.
I should say the hind legs look awful for a reason right now. It's what I'm holding the horse with to paint him, so the hind legs will be the last thing I go back and do.
Here's the next couple of layers done.
He's gonna be so pretty. I'm predicting he's gonna NAN his very first show.
Ok, I didn't update anymore yesterday as I had a massive migraine headache and took like 4 muscle relaxers during the day and I was just all messed up yesterday. So I'm back at him today. It's March 31, 2015 and here are some more update images.
He's getting darker and more spotted. I'm still not getting much done on the legs yet. I'm slowly getting down the legs but I'm still doing those last. I am working on the inside of a couple though. These are pictures with and without the flash.
April 8, 2015 Update!
I'm now getting into the legs. I also did an antiquing layer, well several really, to the front half of the body. I'm also starting to block out the legs with some base color. It's sloppy at first them I clean it up. So it'll get better.
(the clear gloss in his eye in the above picture hadn't dried clear completely yet. It's still a little cloudy. That's what that milky haze at the bottom of the eye is)
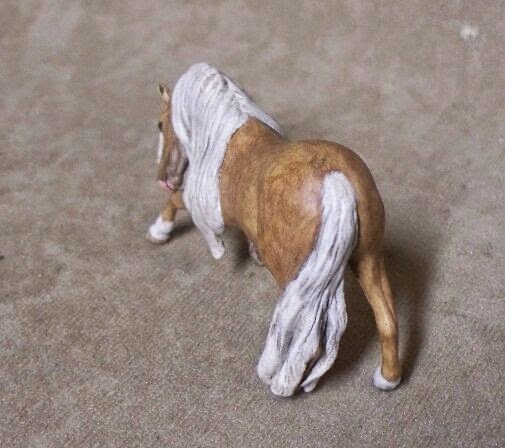
Oh, and the little stablemate is completed. So, scroll down for pictures of her completed. I went with Palomino!
Also, I'm working on another Andalusian Stablemate from the new Brigette Iberl mold. I'll keep these images at the bottom of this step by step appy.
I'm not sure if I want him to be a buckskin or a palomino yet.
I had him nearly done but I discovered he wouldn't set level with all legs on the ground. He kept flipping over on his side, so I had to bend his outstretched front leg some and now he's perfect. Plus I had to bulk up his rump and flanks a little bit more to.
These last two were taken without the flash in florescent light.
April 9, 2015 Update!
I've started getting to the spots on the legs. Forgive me that he was so shiny in these images. I had just sprayed him and couldn't wait for him to dry before taking his pictures. This is without a doubt to me anyway, one of if not the prettiest Appaloosas I've ever done. I wish I could keep him and send him via Proxy to some shows myself. (sigh) I really do love his right front sock in the above image, and I may just white his sock back out again by the time I'm done. I don't know. But for now, he's got spotted socks.
I have a ton more to do to him yet. He's still just in the base coloring. I have to go back and paint the detailed edges of the patterns with white, I have to also put tiny hairs all over him. I've also got to give him tiny speckles and spots to.
But here's the newest update.
April 10, 2015 Update!
He's getting closer to completion. I may take him off of Offers and just set him up with a reserve on Ebay or maybe even sending him to some shows myself first. He's so awesome! I still have some more detailing to do on him yet.
He's coming along.
April 14, 2015 Update!
And he is FINISHED! Over 30 layers of color and an entire can of Testors DullCoat. Pastels, Acrylics, Antiquing, Washes, Dry-Brushing. Now, I gotta figure out a name for him.
(the clear gloss in his eye in the above picture hadn't dried clear completely yet. It's still a little cloudy. That's what that milky haze at the bottom of the eye is)
Also, I'm working on another Andalusian Stablemate from the new Brigette Iberl mold. I'll keep these images at the bottom of this step by step appy.
I'm not sure if I want him to be a buckskin or a palomino yet.
I had him nearly done but I discovered he wouldn't set level with all legs on the ground. He kept flipping over on his side, so I had to bend his outstretched front leg some and now he's perfect. Plus I had to bulk up his rump and flanks a little bit more to.


